User Guide MIC App Board
Orientation
Introduction
Managed IoT Cloud (MIC) is a secure cloud platform for device and data management that generates valuable and useful insights about your connected products. It provides the building blocks you need to connect your product, collect and store all product data, and extract value and insights from that data. It includes a self-service tool and a customizable application to get you started quickly, and when your digital service starts to grow, Managed IoT Cloud scales with you, globally.
Telenor Connexion cooperates with device and application partners to provide a complete end-to-end solution for your digital services. Business relationships with the partners are solely established by you based on your needs.
 Conceptual overview of Managed IoT Cloud
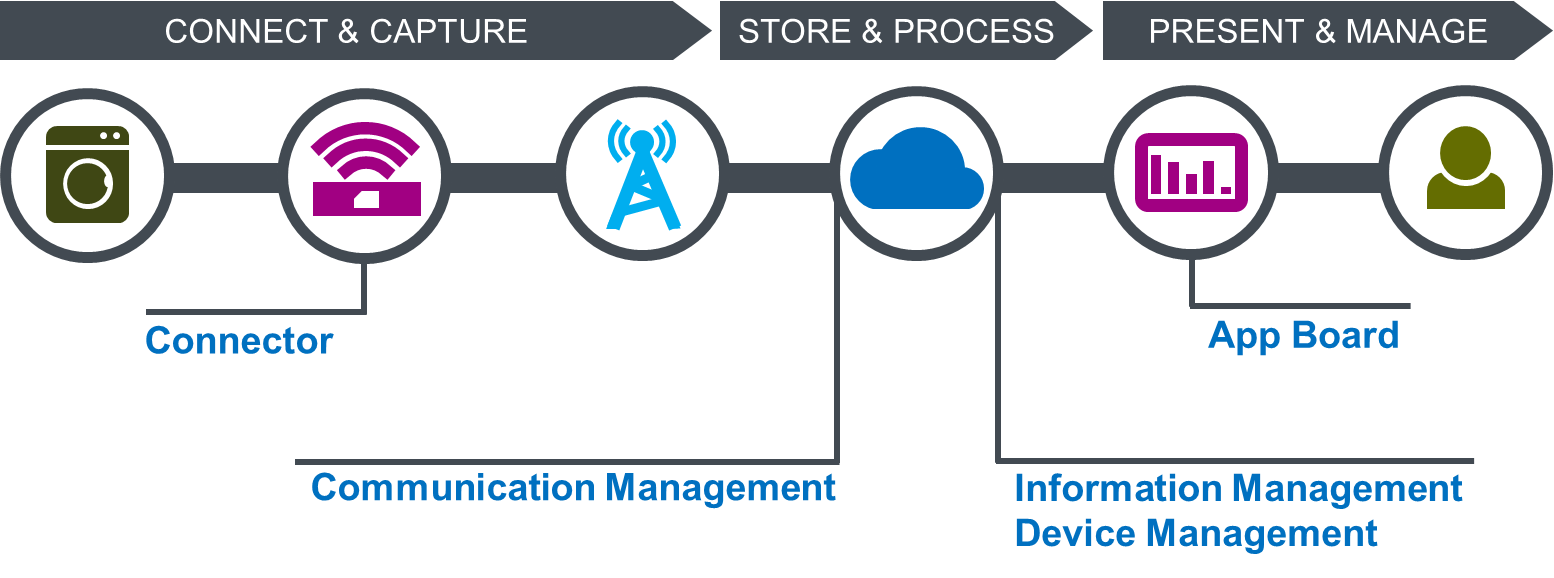
Managed IoT Cloud components
Managed IoT Cloud consists of three main parts and two APIs:
-
App Board is a ready to use, customizable application that manages and presents the data related to your Things.
-
Platform consists in turn of three parts:
- Information Management - Stores and processes the captured data.
- Device Management - Manages Things, certificates and firmware.
- Communication Management - Authenticates Things and secures communication.
-
Connector is an optional software component that runs on the Thing and simplifies connecting Things to the cloud.
And the Platform exposes two APIs:
- Thing API. Used to communicate between the Platform and Things.
- Cloud API. Used to communicate between the Platform and applications.
Access and logging in
Access
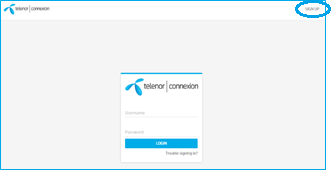
App Board is available on the URL https://\<youraccount\>.mic.telenorconnexion.com
You need a modern browser running in normal mode (private mode might not work). Telenor Connexion tests with the latest versions of the following browsers:
- Chrome - recommended
- Safari
- Firefox
Internet Explorer 11 is not recommended to use. App Board uses a responsive design that facilitates usage by modern browsers, including Android and iOS devices. Please note that for some devices, performing more complex operations might affect the user experience.
Sign up and Log in
To sign up, click Sign Up in the upper right corner on the login page.
-
Fill in your user details and an email will be sent to you with a verification link for you to follow.
-
Then a notification is sent to an administrator who will approve your account and give you the appropriate access and privileges.
-
Once approved, you will receive an email confirming your account and you can now login to App Board.
Note! If Sign Up is not visible on the login page, it has been disabled on your application. You then need to contact an administrator to get an account.
App Board Overview
The Managed IoT Cloud App Board is a customizable web application, leveraging the platform APIs. It allows users to view, manage, and analyze data from the connected products and provides mechanisms to interact with them. It also serves as a self-service tool for managing the products and their configuration in MIC.
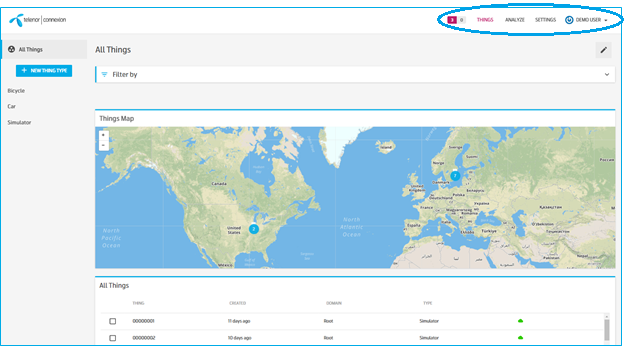
App Board has five top menu items:
Events | Things | Analyze | Settings | User
Note! Depending on your user’s Privileges, some sections and capabilities in App Board will not be available to you.
Events
Events are generated both by the system and when rules set by users are triggered. Events are classified as “Warning”, “Alarm”, “Notification” or “Internal”, and they can have an acknowledgement flag, requiring a user to acknowledge them before they are suppressed.
The events menu item consists of two counters tracking new events. The first counter tracks new events that require acknowledgement, while the second counter tracks all other events.
Clicking on the events menu displays a pop-up that shows the last 10 events of both events needing acknowledgment and other new events.
The Events page, reached by clicking “Show all” in the events pop-up, shows all events. Here events can be filtered on classification, need for acknowledgement and time of the events.
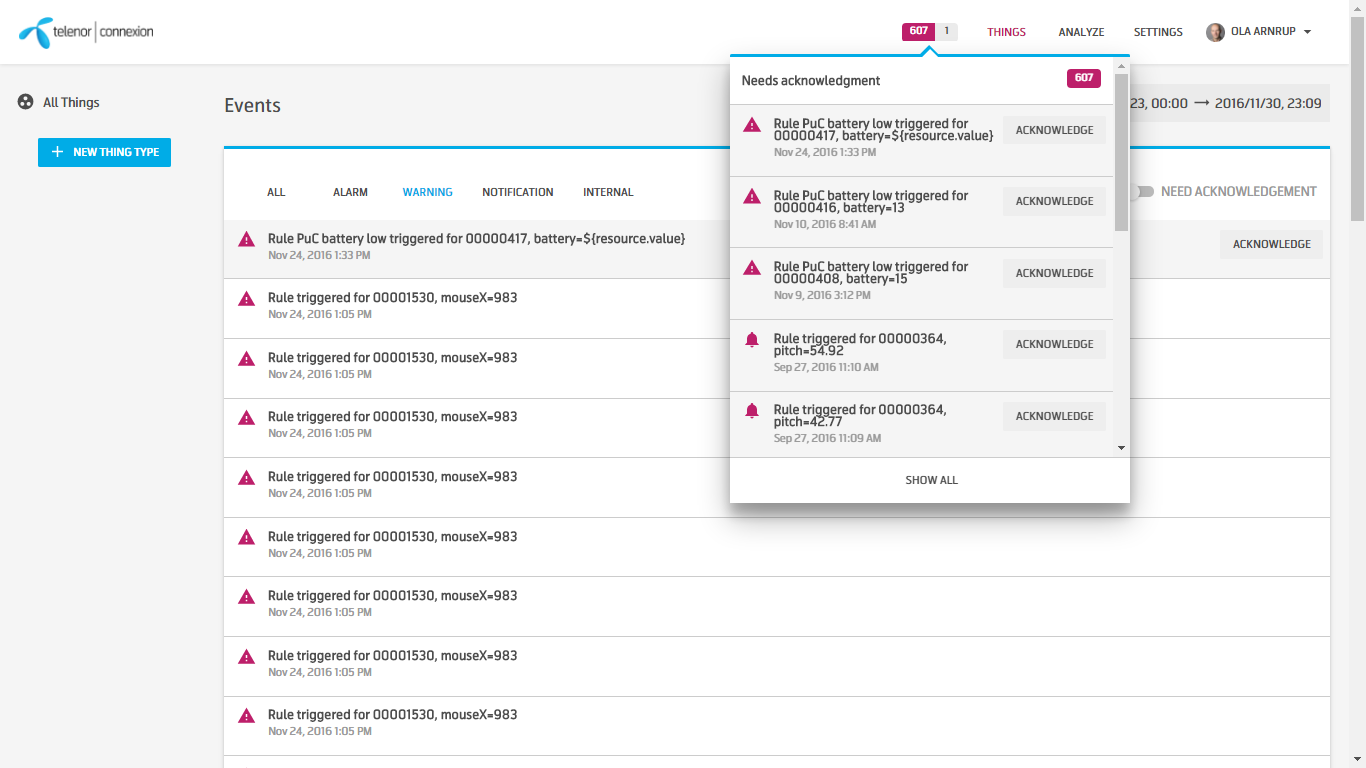 Events are displayed as two counters in the top menu, as a pop-up and as an all events page.
Things
Things are MIC representations of connected physical devices or Customer Products. A Thing typically has one or more resources, representing a source of, or a placeholder for, data. An example of a resource is a temperature sensor, which sends discrete measurements of a temperature. Such measurements are stored as observations, each consisting of a measured value and a timestamp.
When a Thing is first defined, credentials for authentication and encryption are created. The credentials issued for a Thing can be managed from the App Board.
A Thing Type is a group of Things with common characteristics, like cars, pumps, lamps or boats. It can also be used for more fine-grained separation, e.g. having different Thing Types for different pump models. The model provides flexibility to cater for varying needs.
The Things menu in App Board gives access to different Dashboards to view and manage Things and their data.
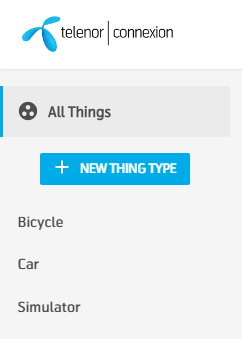
The left hand menu is headed by the All Things item, which will take you to the All Things Dashboard. The rest of the left hand menu contains the Thing Type list, and clicking on a Thing Type takes you to the respective Thing Type Dashboard.
-
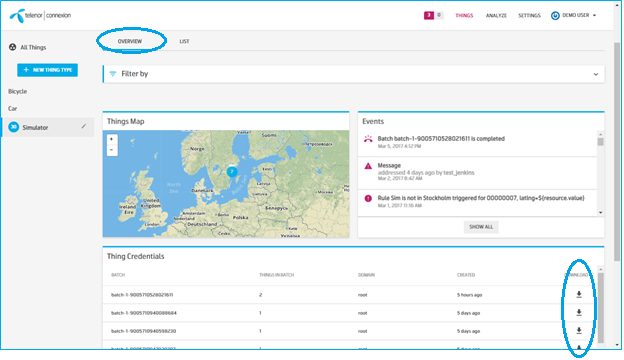
All Things Dashboard is a per-user configurable dashboard for all Things in the system with widgets like map, list, event and Thing credentials.
-
Thing Type Dashboard is a dashboard for all Things that belong to a certain Thing Type. This dashboard is configurable, and multiple dashboards can be saved and shared with other users. Since this dashboard represents a collection of Things of the same type with the same known resources, it is suited for different kinds of aggregate presentations, e.g. all Things on a map, Things list, histogram distribution chart, etc.
-
Thing Dashboard visualizes an individual Thing. It is configurable, and multiple
dashboards can be saved and shared with other users. The dashboard is populated automatically as soon as the first Thing of this specific Thing Type connects. Every resource reported by the Thing will create a widget automatically.
All dashboards can be configured with a variety of widgets, and both dashboards and the widgets themselves can be configured to suit different use cases.
Dashboards have filtering functionality for time period, metadata, observation data, and location.
Functionality for creating and managing Things and their certificates are found in relevant dashboards.
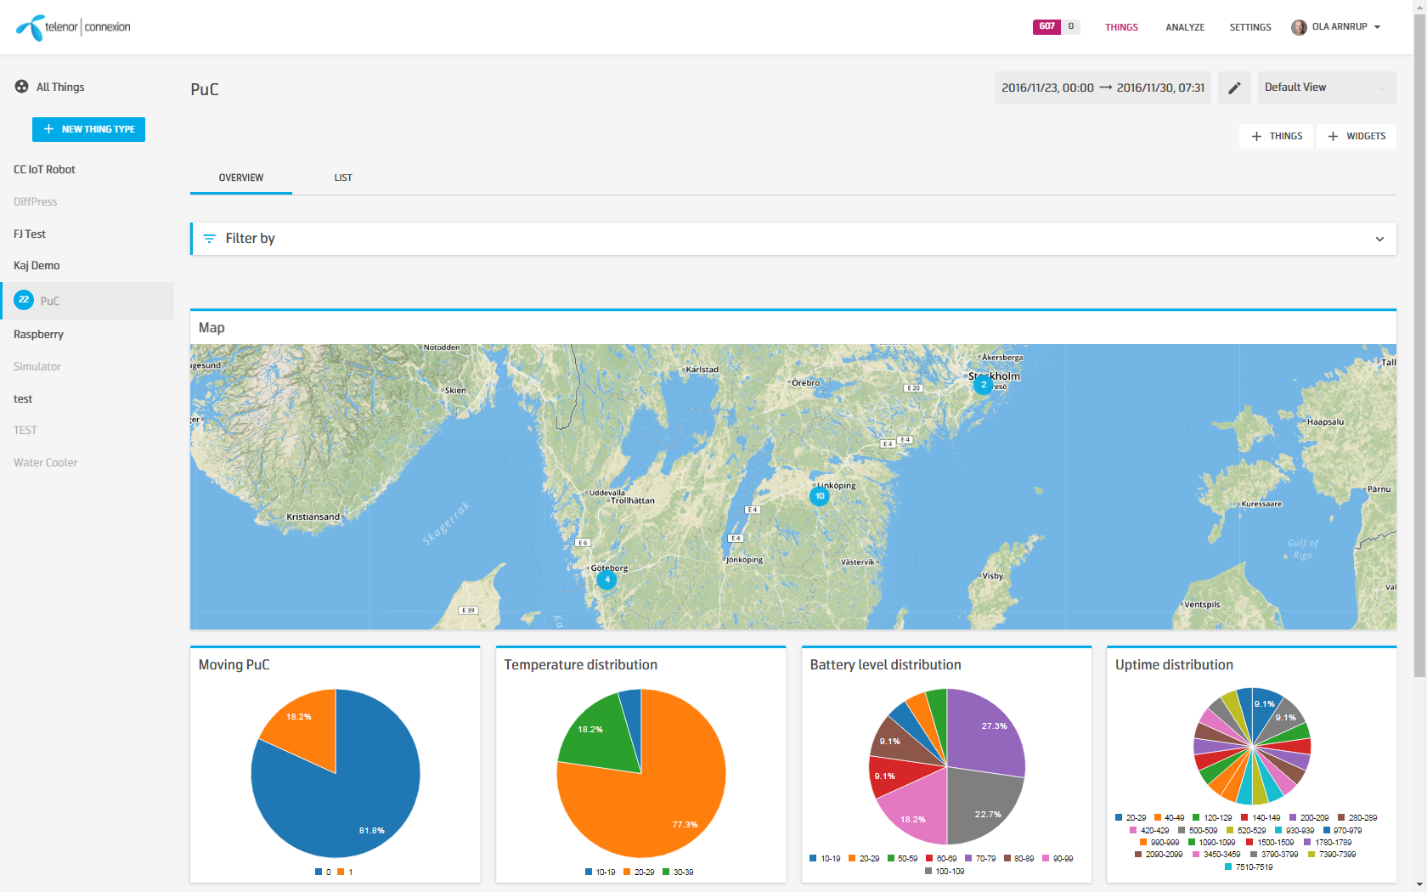 Example Thing Type Dashboard with map and pie chart aggregations
Analyze
Analyze provides the possibility to view graphs for several series of data, originating from one or several Things, with possibilities for zoom and export to CSV file for use in other programs (e.g. Excel). Analyze can be used to identify correlation patterns between different variables, e.g. “in this chart, we can see that the pumps run at max power when there has been a long period of warm and dry weather”. An analysis can be saved and opened again later.
Settings
Settings menu has 11 items:
- Domains are used to organize your Things, Thing Types and users in a tree structure (max 7 levels, incl root level), thereby controlling access rights. A user in a specific domain can access the Things and data for that domain and its sub-domains. Custom metadata fields can be configured for the domain structure, e.g. street address for local sales office.
- Rules are used to create triggers and actions, e.g. “If any of my products report a temperature above 30 degrees three times in a row, I would like to generate an alarm event and a notification email”. Rules can also set the value of resources and use webhooks to trigger actions in external applications.
- Users provides a user management view. The user management functionality leverages AWS Cognito. Sign-up functionality is optionally supported.
- Roles gives fine-grained user access control capabilities. The Role defines through Privileges what actions a user is allowed to perform. A user can have many different roles, and the privileges of these roles are applied in an additive method.
- Branding allows a user with root access to customize App Board in terms of logotype and colors to match their profile and brand. In addition, the login page can be customized by naming the application and setting additional text information.
- File browser allows users to manage all files in the system, separated in four categories: Root, Public, Things and Thing Types.
- Thing Types is a management tool of Thing Types and their resources, giving both an overview and detailed control of how resource data shall be represented in the system.
- Manage Units allows definition and management of units to be used throughout the system.
- Device Management includes tools for driving large scale device update campaigns.
- System Management holds controls for end user agreement management and data retention policies.
- Data Export gives an overview of existing Data Export jobs and executions.
User
The user menu has 3 items:
- Your profile provides information about the currently logged-in user with the ability to update profile details.
- About provides information about the system version and various endpoints in use.
- Log out will log the current user out of the system and return to the login page.
Connecting a Thing
Starting from an empty App Board, this is what you need to do to connect a thing and start receiving data from it.
Create Thing Type
Note!
A Thing Type is a container for things with the common characteristics and resources. A Thing Type defines what the Thing is (e.g. the measurement unit for a resource) and thus allows for configuration of widgets and Dashboards based on prior knowledge about what each resource represents.
Thing Types are domain aware. Therefore you define its domain, i.e. where it will exist and can be used, which can be the domain root or any other domain below. In order to edit the Thing Type itself, including its view modes, a user needs to have access to the domain level of the Thing Type.
Tip!
There is a “reserved” Thing Type label named Simulator, which is intended for kick-start and simple demo for new users. If this is your first time using App Board, creating a Simulator will help you to send data to the cloud for visualization in widgets and explore the possibilities of App Board.
- To create a Thing Type, choose + NEW THING TYPE in the left menu.
- Enter a Label, Description and Domain for the Thing Type and save.
- To get kick-started, create a “Simulator” Thing Type
- Now you will see your Thing Type in the left menu.
- In the example, three Thing Types have been created
Create a Thing
Note!
A thing can be created in the domain of the Thing Type and its subdomains.
Creating a thing means you create its credentials (thing-ID, certificate, public and private keys).
- Go to the Thing Type for which you want to create one or a batch of things
by clicking its name in left menu. This brings up the Thing Type dashboard.

- In this example “Simulator” Thing Type is used
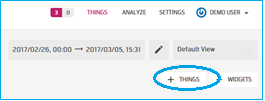
- You create a thing by clicking + THINGS on the right side of the thing
type dashboard.
- Enter Number of things to add and Domain for the things and confirm
by clicking CREATE.
- To get kick-started, create some “Simulator” things
- Things are created in batch and an event notification is created when
finished.
- The things will then be in the things list
- The things credentials will be available in the Thing Credentials widget
Note!
For IoT Gateway things, please see additional documentation here.
Download credentials for your things and load them to your things to connect
- Go to the Thing Credentials widget, found in the overview tab of the thing
type dashboard.
- Click download symbol to download a zip-file named according to the batch name.
- It contains one folder per thing in the batch. Each folder is named for its Thing ID.
- In each folder, the credentials for that Thing are found in three files:
- cert.pem
- privkey.pem
- pubkey.pem
- Load the credentials into your things.
- This is an operation specific to your things
- Once imported, your things will be able to connect and be authorized to the Managed IoT Cloud Platform.
Find Your Things
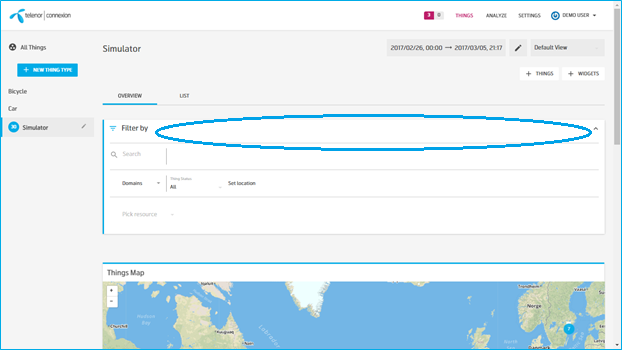
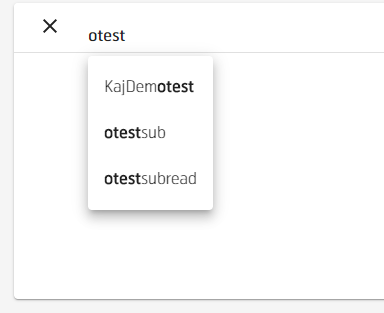
Your things are all available in the things lists, both in All Things dashboard and Thing Type dashboard.
Once you have many things, you´ll need to filter.
- Expand the filter by clicking the filter bar.
- Enter one or a combination of filter criteria:
- Search in thing name
- Domains
- Thing type (available in all things dashboard)
- Thing status
- Thing location by clicking “Set location” which opens up a map for marking borders of the geofilter
- Thing resource observation including comparators (Above, Equal, Below)
- Now both the map and list shows the filtered selection.
Customizing dashboards and widgets
Edit Thing Metadata
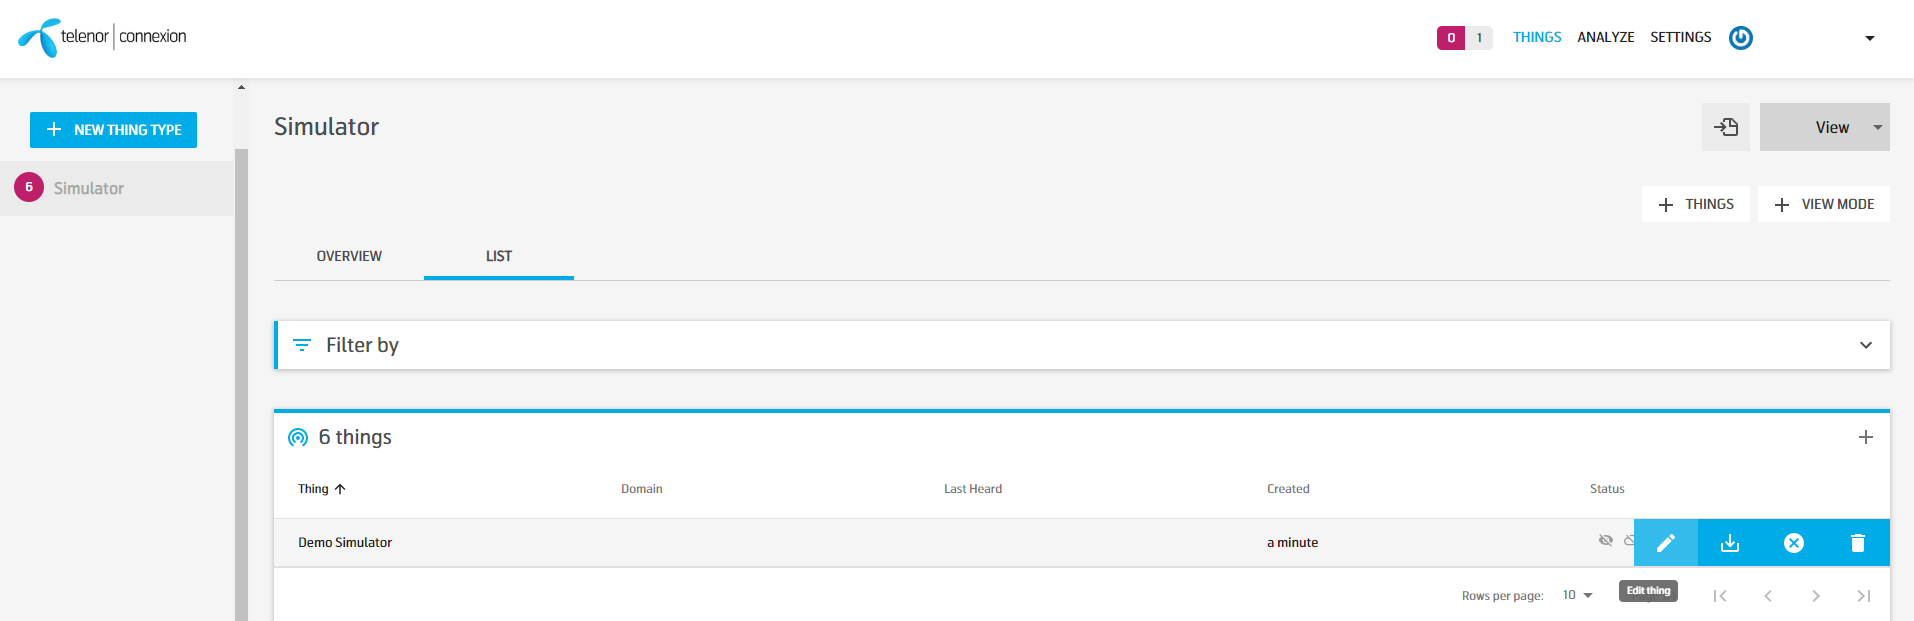
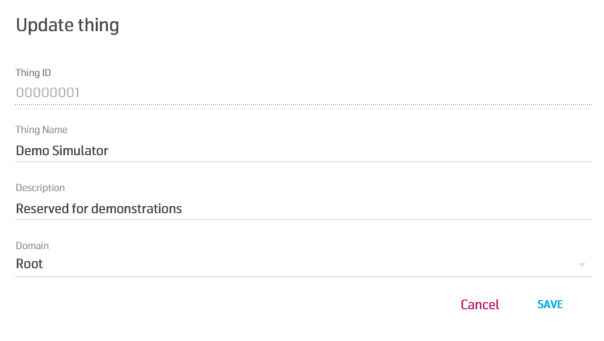
You edit thing meta data by selecting the thing in the things list.
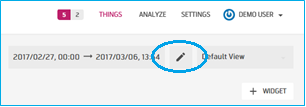
- Select the Thing you want to edit by hovering over it and clicking on the edit pencil.
- This brings you to the “Update thing” dialog where thing meta data can be
updated and saved.
Connecting your Thing for the first time automatically sets up the Thing dashboard
Note!
The Thing Dashboard is automatically set up according to the resources that your things report and is common to all things of the same Thing Type, e.g. if your thing reports temperature, speed and acceleration, three widgets will automatically be set up to map these resources. If location is reported on the latlng format, a map widget will automatically be set up.
In configuration, you can customize the content, look and feel of the thing dashboard to suit your use cases. You can configure and save many different dashboards for the Thing. The various dashboard configurations apply not only to the thing you are editing, but to all Thing dashboards of the same Thing Type.
When saving a dashboard you can select whether to save it as a personal dashboard, only available to you, or as a domain dashboard available to all users having access to the specified domain. Creating domain dashboards is a great way to share dashboards with many users.
If you have a newly created Thing Type with no things yet connected (and thus no resources reported), the Thing dashboard will be empty. You need a Thing to connect to MIC to auto-generate the dashboard before you can start customizing it.
Tip!
If it´s your first time using App Board, creating a Simulator will help you sending data to the cloud for visualization in widgets and explore the possibilities of App Board. No installation of certificates on the device, etc is needed.
The example below will consider connecting a simulator for the first time.
- Go to the Thing Dashboard by clicking the thing name in the things list
- For things that have connected and reported a location, you can also click the thing pointer in the map.
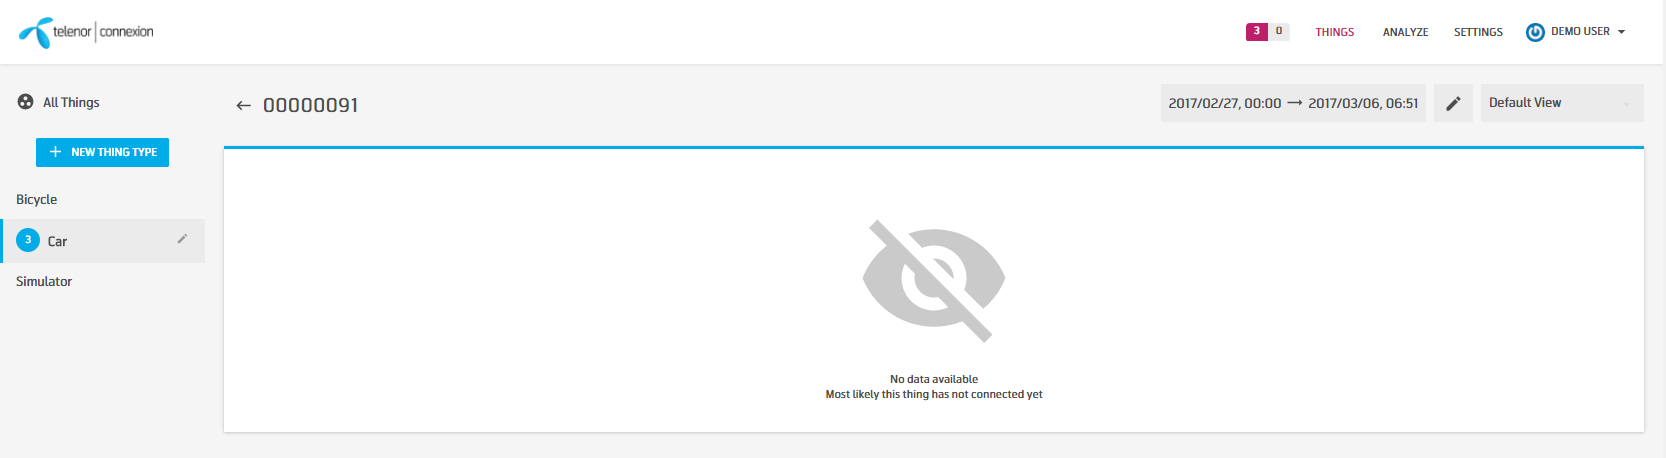
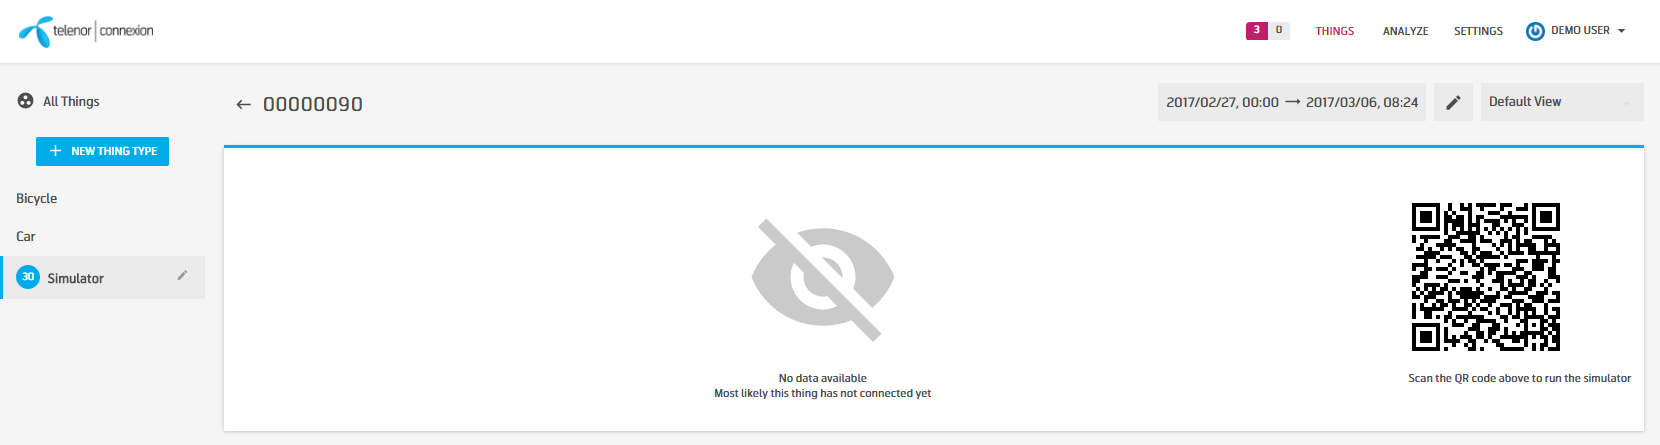
- If the thing has not yet connected, the dashboard will be empty and a symbol
“crossed eye” will appear in the dashboard indicating that the thing has not been seen yet and no data is available.
- Example for a general thing:
- Example for a Simulator thing, with the QR code on the right:
- Example for a general thing:
- You now need to connect your Thing to the MIC Platform.
- For a general thing, this depends on the characteristics of the thing, but basically the things needs to authenticate and connect to MIC through the Thing API using the thing credentials.
- For the Simulator, you can connect right away. Below the Simulator will
be used as example
- Connect using your computer as the simulator >> Click on the QR code with the mouse pointer, preferable right clicking and chose open in new tab.
- Connect using your phone as the simulator >> Scan the QR code
- If asked about your user credentials, please enter them to get started.
- Your computer or phone now starts sending data for about 1 minute
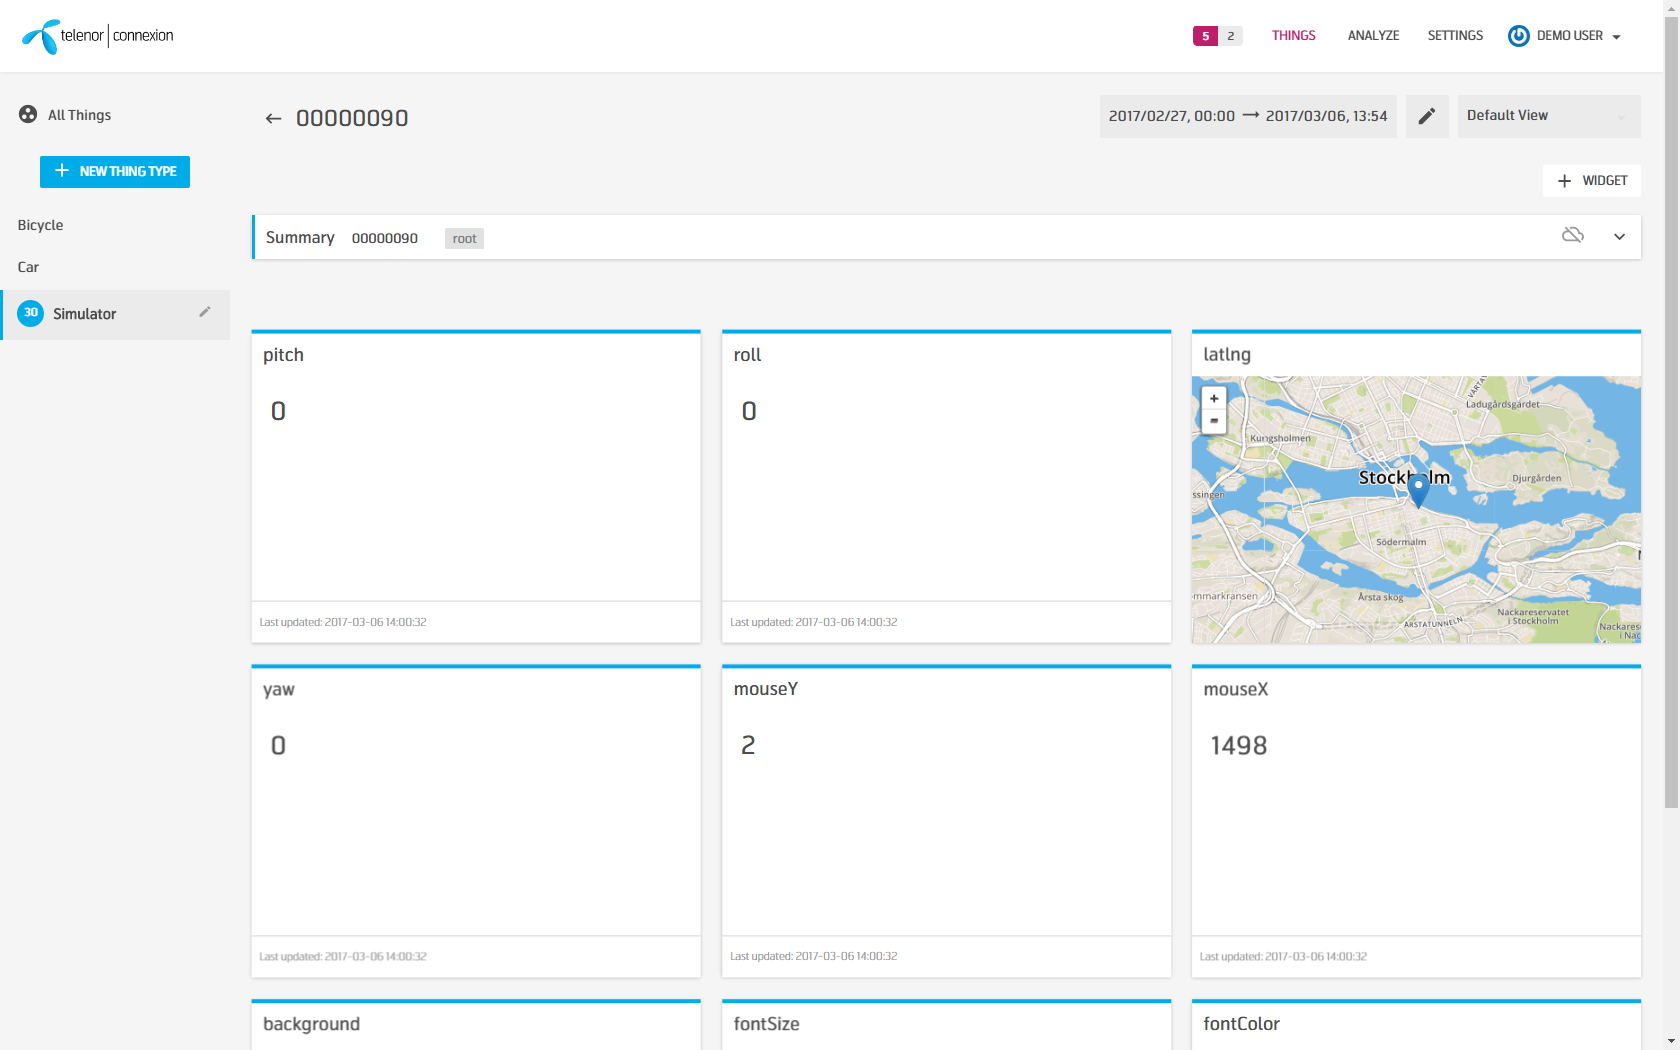
- Once connected, your thing sends data to the cloud and the Thing Dashboard
is automatically set up. For the Simulator, it looks something like this:
Customizing Thing Dashboard
- The “pen” symbol in the upper right corner brings you into edit mode. Please
note that you need to have the Dashboards privilege with the UPDATE and READ operation to be able to edit a dashboard.
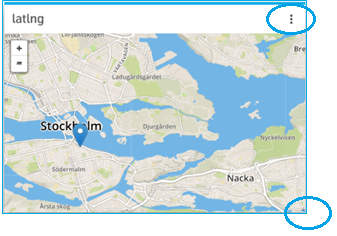
- Now you can design the dashboard look and feel by moving the widgets. To move a widget, just click in the widget bar, hold down, drag and drop.
- To resize a widget, click and hold the bottom right corner and pull to adjust the size. The widget will snap into a pre-defined grid.
- To delete or edit the widget, click the widget menu icon.
- Edit brings you into the same form as adding a new widget, see below
- Save the dashboard either as a personal dashboard or a domain dashboard available to all users having access to the specified domain. You can save many different dashboards, just name them differently.

Add a new widget
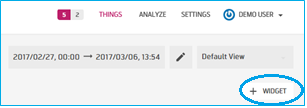
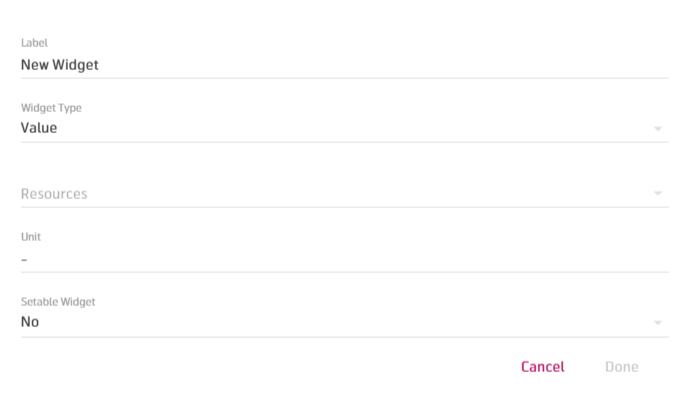
- To add a new widget, click + WIDGET.
- A new widget / edit widget form pops up.
- Name your widget.
- Choose widget type.
- Enter the settings specific to the widget type.
- Save your dashboard once you have added your widgets.
Note!
Widget types are as follows:
- Value for simple presentation of the last observed value, text or number.
- Gauge to represent last observed number value on a gauge meter with minimum and maximum value.
- Map marks the last observed position of a Thing on a map (reported in lat,long format).
- Table shows observations (up to 100) as a list, either with smart filtering or all observations.
- Time Series shows observations (up to 100) in a time chart, either with smart filtering or all observations.
- Files list all files available for this Thing, including Thing image.
- Events show events for this Thing, either all or only a selected classification.
- Dynamic is customizable both in terms of look and content. You can combine many resources and tailor the presentation with markdown language.
- Process where customers can upload an image of a machine or a machine process and add overlay resources to get a visual monitoring view of the process with multiple resources.
- Resources overview gives a list overview of all available resources for the Thing Type. The list will show Resource name, last reported value, last update, data type, and resource metadata. With this widget, you can easily and with almost no configuration get a full overview of the Thing and status of all its resources.
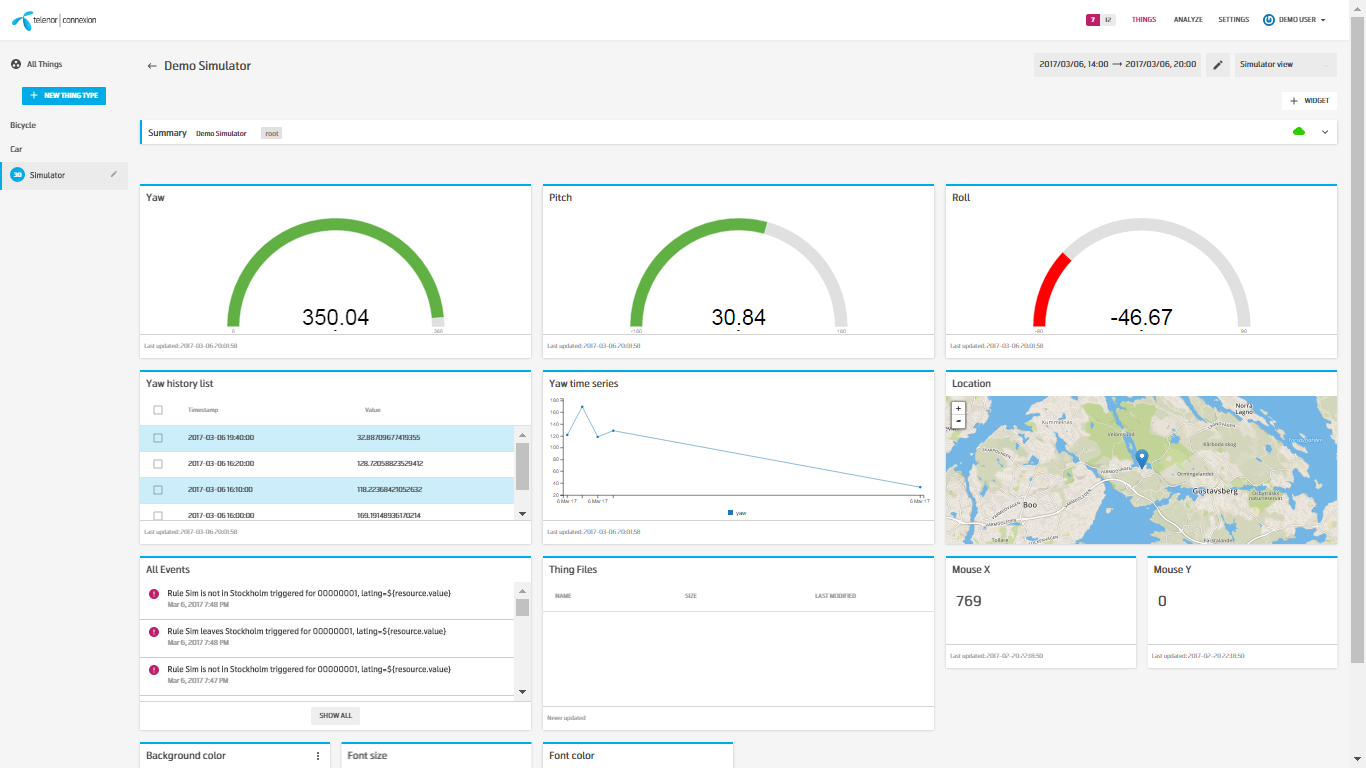
Below is an example of a customized dashboard for a Simulator, saved as “Simulator view”.
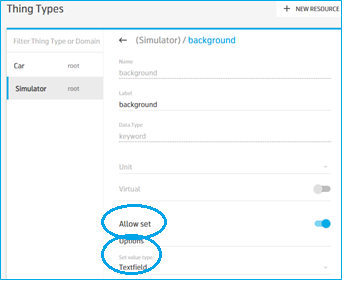
Set the value of a resource
To set the value of a resource in a widget, the resource must be settable on the physical device (in the thing/device application). Enable setting of the resource from MIC by:
- Go to Thing Types in Settings top menu and select the Thing Type and the resource you want to enable/disable.
- Toggle “Allow set” to desired state (Enabled is default)
- Under Options you define whether set input is a free Text field or a
Dropdown with defined values.
- If text field, any value can be set
- If dropdown, you configure the available values by adding them one by one with the “+” sign.
Once a resource is allowed to be set, you can enable setting the resource in a widget:
- Find a widget displaying the resource you want to enable, click the menu icon and select edit.
- In edit widget form, select Enable set value “Yes”.
- Confirm with Done and save the view mode.
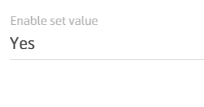
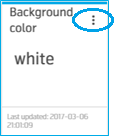
Now this widget has a menu icon in the upper right corner. Click it to open the set resource dialog and set the value.
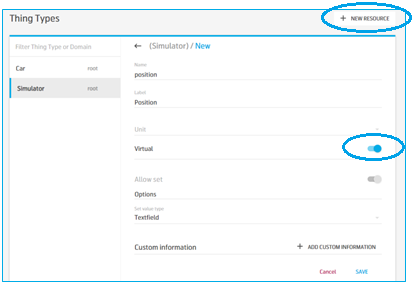
Creating a Virtual resource
Note!
A virtual resource can be seen as meta data on the thing, information that only exists in the MIC platform and not on the physical thing itself, thus the name virtual resource. However, the virtual resource is stored in the Device Shadow, thus it behaves just like any other resource in the MIC platform.
Virtual resources can be used for many purposes. One example is to set the location for a thing that is not capable of reporting its location. Another is to store a calculated value or output from the rule engine.
To create a virtual resource
- Go to Thing Types in Settings top menu and select a Thing Type
- Click + NEW RESOURCE and edit the form including resource name and toggle Virtual on.
- After saving, the virtual resource can now be used in widgets.
Permissions
Introduction
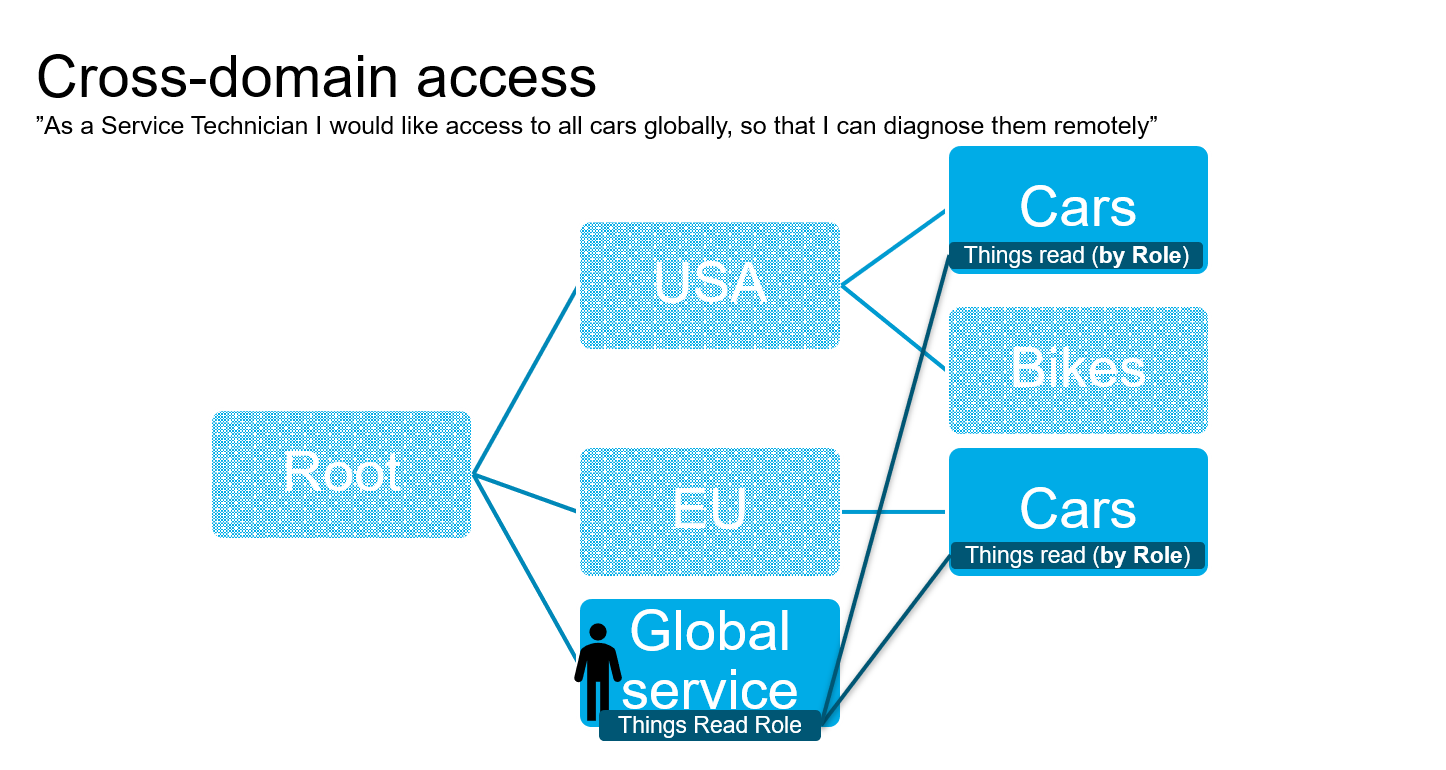
Managed IoT Cloud offers extensive functionality to manage user access.
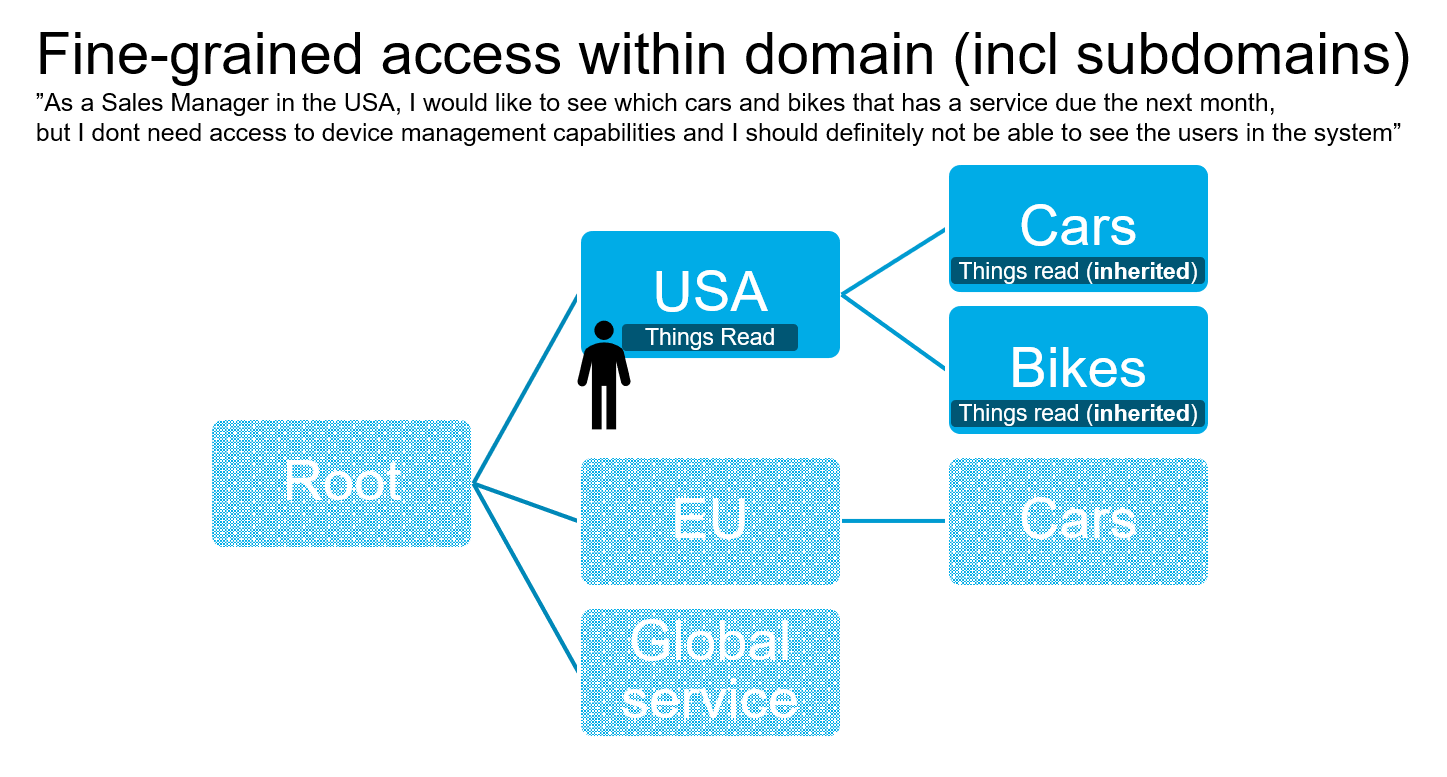
The foundation of user access management is the hierarchical domain tree where all Things reside. In this domain tree, a user has a home domain, and any access the user has applies to their home domain and all child domains. Access does not flow upward in the tree, nor does it extend to any sibling domains.
Permissions allows further capabilities to control user access.
- Fine-grained access control within domains, e.g. allowing access to things, but not to device management
- Cross-domain access, e.g. letting a user in one part of the domain tree access data in a different part of the domain tree
Roles & Privileges
Privileges are given to users through Roles. MIC comes with predefined system roles, and beyond this Permissions gives you the ability to create and configure additional roles tailored to specific user needs.
A user can have many different roles, and the privileges of these roles are applied in an additive method. For example, a user with the ReadWrite role in domain A can be given an additional Role that grants privileges in domain B (domain B being a sibling to A).
Each Role has one or more Privileges. The Privileges define what the Role allows a user to do. A Privilege applies to an object type, e.g. “Users”, “Thing Pub/Sub”, or “Observations" (historic Thing data). A Privilege can apply to either the user’s home domain or to any other specified domain.
A role can be given to any number of users. This makes updates to privileges for different groups of users easy, as an update to a role affects all users with that specific role.
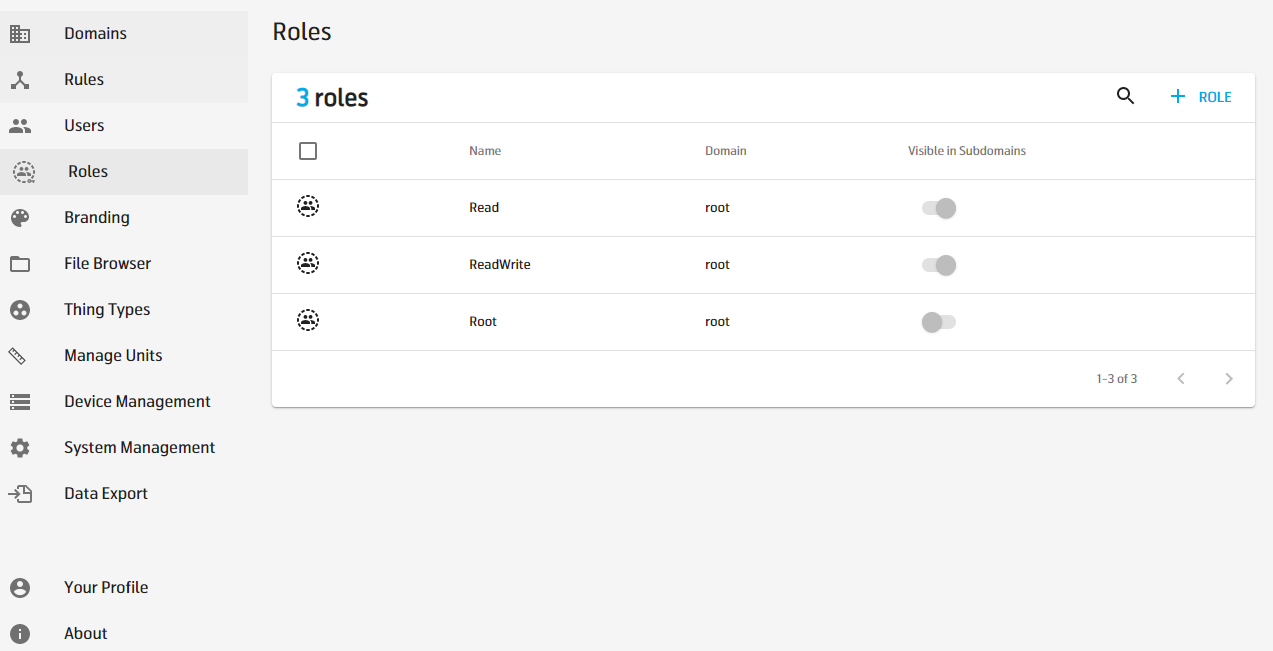
System Roles
System Roles are predefined roles which cover common use cases in MIC. These roles provide a simple way to give users either read or read and write access in their home domains. The privileges for system roles cannot be modified, and the roles cannot be deleted. A user can have only one system role.
The following system roles are available:
- Read: Gives read access to all entities in a users home domain (and down)
- ReadWrite: Gives read and write access to all entities in a users home domain (and down)
Privileges
A Privilege gives access to specific operations on API endpoints and therefore specific operations in App Board. A privilege applies either to the user’s home domain or to any other specified Domain.
For each privilege object, the access level is set (Allow / Disallow) on each of the CRUD operators (CREATE, READ, UPDATE, DELETE). Note that not all CRUD operations are valid for all privileges.
Available privilege objects
| Regular Privilege Object | Description | Properties available to configure (CRUD: Create, Read, Update, Delete) |
|---|---|---|
| Dashboards | Gives access to Dashboards | CRUD and domain |
| DataExport | Access to the Data Export functionality | CRUD and domain |
| Domains | Access to the Domain tree | CRUD and domain |
| Events | Access to the Events | CRUD and domain |
| Files | Access to Files and file management | CRUD and domain |
| Observations | Access to historical observation data | -R– and domain |
| Permissions | Access to Roles and the permissions API | CRUD and domain |
| Rules | Access to Rules | CRUD and domain |
| ThingBatches | Access to thing batching | CRUD and domain |
| ThingGroups | Access to Device Management Groups | CRUD and domain |
| ThingJobs | Access to Device Management Jobs | CRUD and domain |
| ThingPubSub | Access to real-time observation data | -RU- and domain (not home domain) |
| ThingTypes | Access to Thing Type Management | CRUD and domain |
| Things | Access to Things | CRUD and domain |
| Units | Access to Units management | CRUD, root domain must be chosen |
| Users | Access to User Management | CRUD and domain |
| Settings Privilege Object | Description | Properties to configure |
|---|---|---|
| App Board | Blocks access to App Board | None, blocks by adding it |
| StorageRetention | Access to Storage retention control | CRUD |
Assign users customized Privileges
Let´s assume we have a fresh MIC instance without any custom Roles configured.
Note! You will need a User who, on the domain in scope, has a role that grants read & update on the
PermissionsPrivilege (to be able to create Roles & configure Privileges) and that grants read & update on theUsersPrivilege (to be able to add the Role to the User).
Tip! It is considered a best practice to assign a user the least privileges necessary to perform their use cases. To cater for this, most users shall only be assigned the Read system role. Any additional privileges can be granted by assigning additional roles to the user.
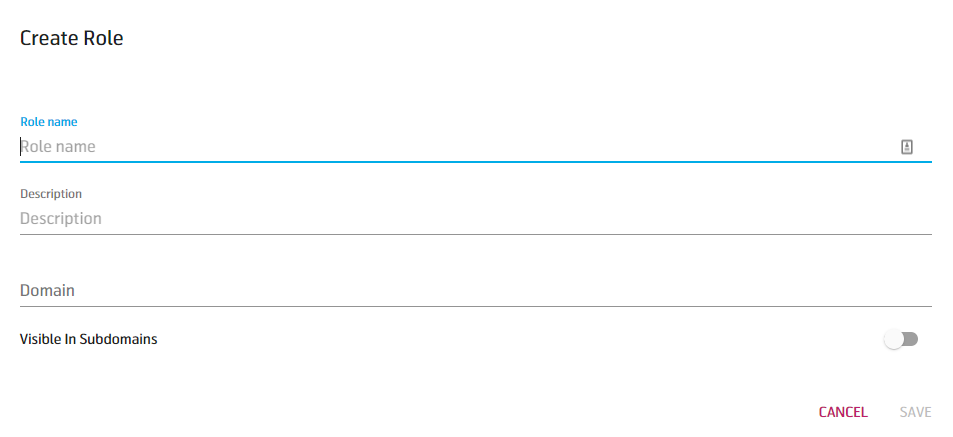
Create a Role
First you need to create a Role.
Note! When creating a Role it is important to understand implications of the available selections.
Domain specifies in what domain the Role will be visible. A user assigning Roles to others will need at least Permissions.READ on that domain to be able to assign the Role. If you choose Visible in Subdomains the Role will also be available to users in all subdomains. (This is the case with the Read and ReadWrite Roles).
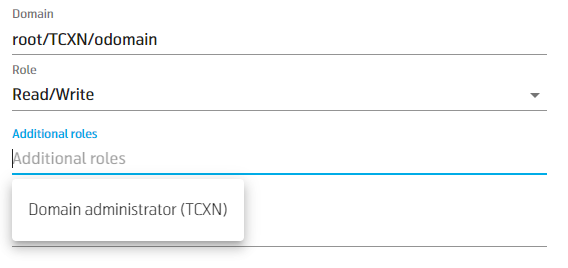
In this example, the Role is placed in the root/TCXN domain with Visible in Subdomains enabled, meaning the role can be used by all users (with Users.UPDATE and/or Users.CREATE) in the TCXN domain and its subdomains for assignments to other users.
Placing a role on root and disabling Visible in Subdomains will mean the role can only be assigned by root users (have at least Permissions.READ on root). This may be relevant for Roles that involves system wide settings like Storage Retention, Units, Thing Batch creation, etc.
-
Go to Roles in the Settings menu. The Roles list page will show you the available system roles, in the picture below the Read, ReadWrite and Root roles.
-
Click +ROLE and edit the form.
-
After saving, the Role is created and you are taken to the Role page. In this example, the Role is named Domain administrator.
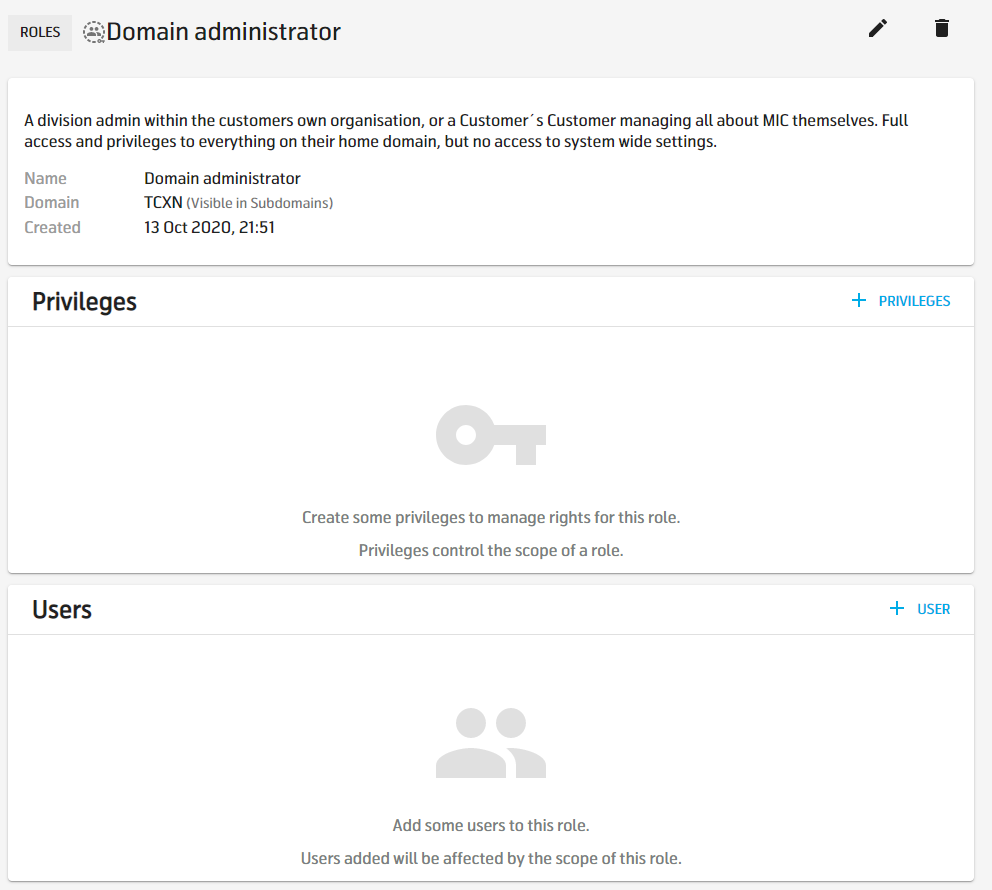
Add Privileges to the Role
The Role page shows you the Role configuration including its Privileges and Users having the Role.
-
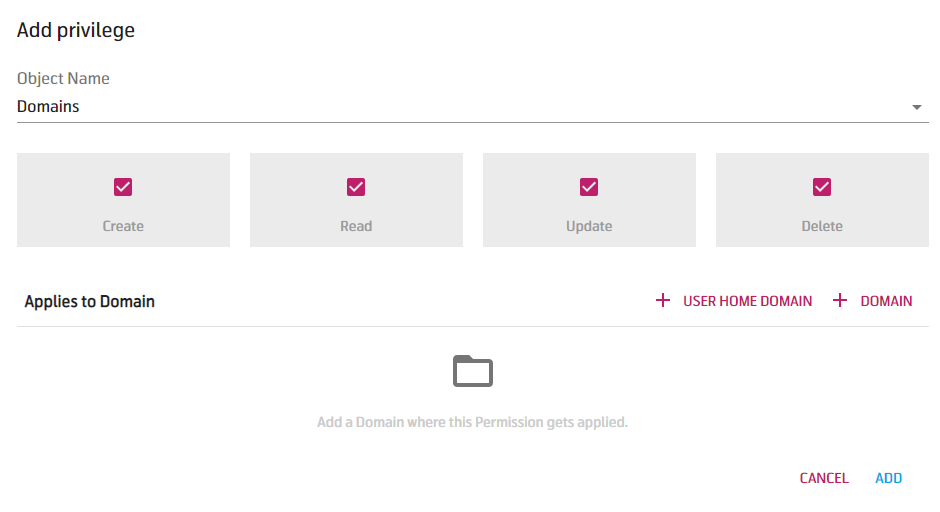
Click + PRIVILEGE, select the Privilege to add and you will see the available configuration for the Privilege. In this example, the Domains Privilege is selected.
-
Check the relevant CRUD controls, and select (if applicable) domain for where the Privilege shall be applied. In this example all CRUD controls are selected, and the Privilege to create, read, update, and delete domains shall be applied to the users home domain.
-
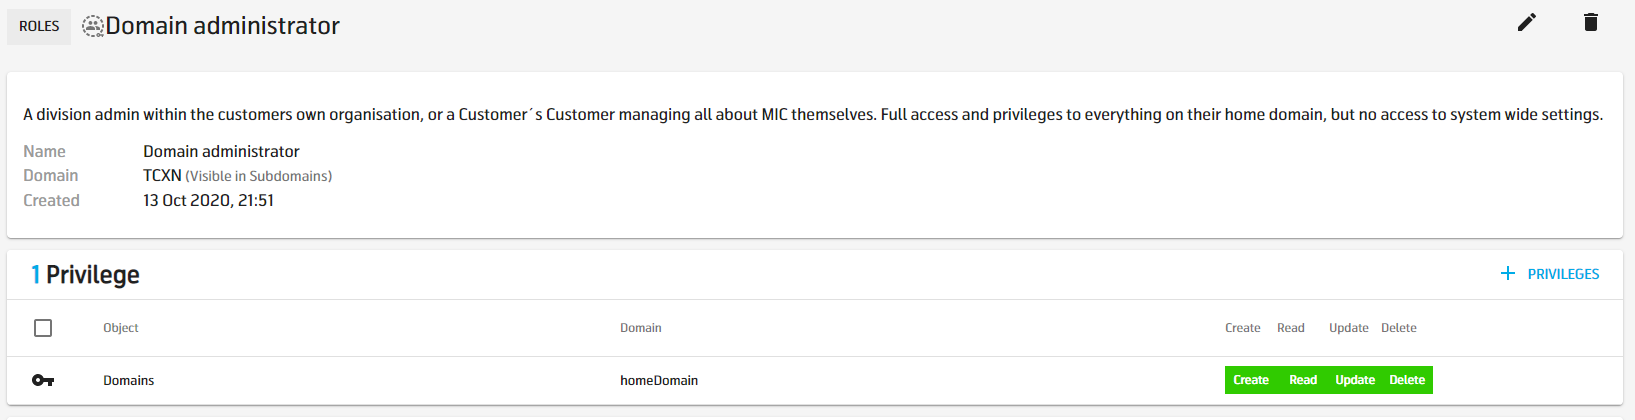
When ready, click ADD. The Privilege is saved to the Role, and you are taken to the Role page with the new Privilege added.
-
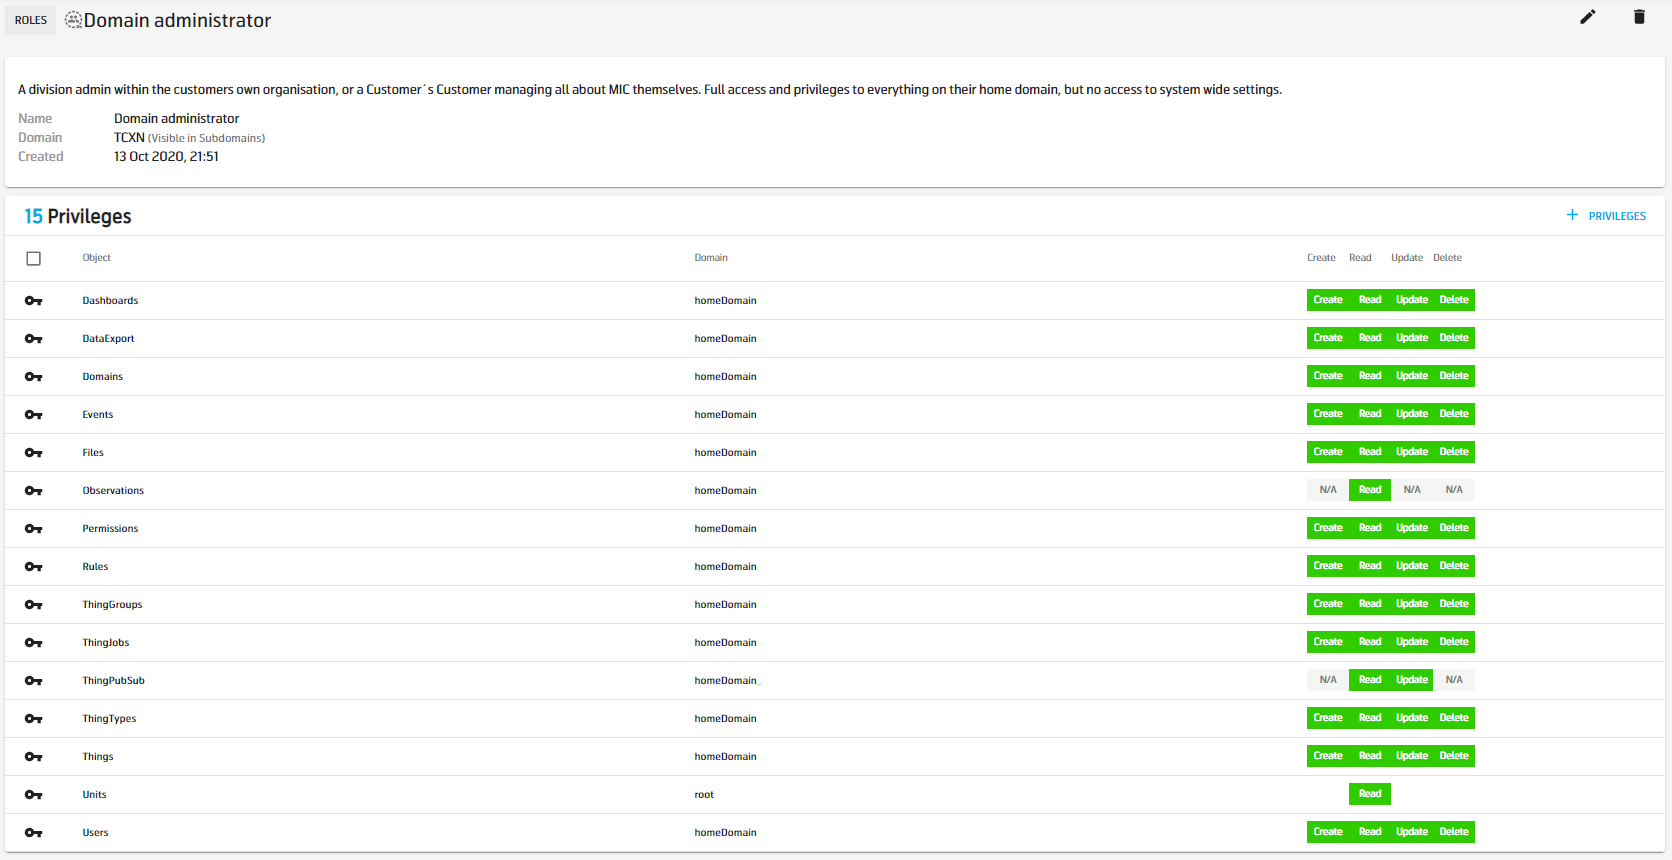
Now, continue to build your Role by adding more Privileges, following steps 1-3 above. In this example, a Domain administrator Role is created, containing a total of 15 Privileges.
Note!
Not all properties are configurable for all Privilege Objects, please refer to the table above “Available Privilege Objects” and to the Permissions Guide for details.
The picture below shows the Role when completed. Note that ThingPubSub cannot be added to homeDomain right now, but is included in the picture for illustrative purposes.
Assign a Role to a User
Note!
The user assigning a role needs to have Permissions.READ on the domain where the role is defined and in addition Users.UPDATE and Users.READ on the domain where the user to be assigned is defined. Enabling “Visible in subdomains” on the role, gives all users with Permissions.READ on subdomains ability to assign the role to users.
This can be done by either adding a User to a Role or by assigning a Role to a User.
-
Go to the Role page of the Role.
-
Click +USER on the Users table on the Role Page (below the Privileges table).
-
Start typing the user name in the search field and select the desired User.
-
User is added to the Role and the Users list is updated.

- Go to the Users menu.
- Find the User in the list or by searching.
- Click the edit symbol on the user to open the edit user dialog.
- Go to any of the two Role fields and select role the Role to add. Confirm by saving the user.